Frequently Asked Question
Connect an ITVDesk Pro virtual ONVIF camera to Milestone XProtect over HTTPS and use SRTP over RTSPS to protect the live video and audio sent to the XProtect Recording Server.
This guide shows how to set up a secure point-to-point connection between ITVDesk and the XProtect Recording Server. ONVIF over HTTPS protects camera management, RTSPS protects stream setup and control, and SRTP encrypts live video and audio in transit. Even if someone captures the network traffic, they cannot view or listen to the encrypted media without the session keys. ITVDesk supports live SRTP key rotation with compatible receivers, allowing session keys to change during a stream without reconnecting. ITVDesk supports AES-GCM-256 with compatible clients.
Watch the full setup with manual add IPCam
The video shows how to add the ITVDesk camera manually in XProtect using its ONVIF HTTPS address and port, then select the encrypted streaming mode. If automatic discovery is available on your network, you can use Express instead of entering the address manually.
Watch the full setup on YouTube
1. Configure ITVDesk Pro
- In Setup IP Camera, select the virtual camera and click Edit.
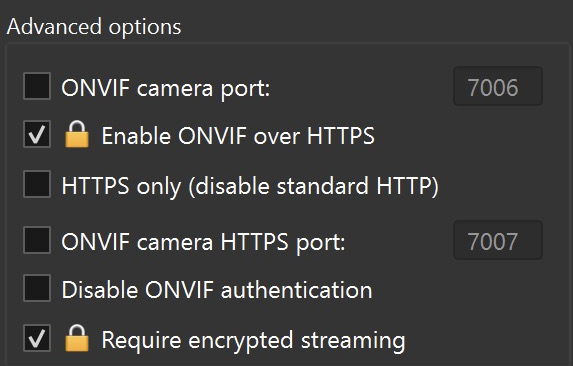
- In Advanced options, turn on Enable ONVIF over HTTPS. Leave ONVIF authentication enabled and use the credentials configured for this camera. Save the changes.
- Start or enable the RTSPS service in ITVDesk. Note the active ONVIF HTTPS port shown in the camera overview and the configured RTSPS port. Use the active port values for your installation rather than copying an example from a screenshot.
- If your deployment must reject unencrypted live streams, turn on Require encrypted streaming for this camera, as shown below. Confirm that your XProtect driver supports the secure mode before applying it to an existing production camera.
Which streaming modes are accepted?
The table shows how Require encrypted streaming affects live streams in ITVDesk Pro 11.4.2. ONVIF over HTTPS protects camera management. To protect the live media, the recorder must also use a supported encrypted streaming mode.
| Streaming mode | Encryption not required | Encryption required |
|---|---|---|
| Plain RTSP/RTP over TCP or UDP | Yes, if the plain streaming service is enabled. | Rejected. |
| RTSP over an HTTP tunnel | Yes, if HTTP tunneling is enabled. | Rejected. |
| RTSP over an HTTPS tunnel | Yes, if the camera's HTTPS service and HTTPS tunneling are both enabled. | Yes, if the camera's HTTPS service and HTTPS tunneling are both enabled. |
| SRTP over RTSPS | Yes, with the RTSPS service enabled and a compatible recorder requesting SRTP. | Yes, with the RTSPS service enabled and a compatible recorder requesting SRTP. |
The VMS or NVR must support and select the matching mode. RTSP over an HTTPS tunnel uses TLS to protect the control and media traffic carried by the tunnel. It is not the same as SRTP over RTSPS, which this XProtect guide uses.
SRTP over RTSPS supports TCP or UDP unicast and secure IPv4 UDP multicast. For multicast, turn on Enable ONVIF RTP Multicast Streaming in ITVDesk and use a network that supports multicast.
2. Add the camera to Milestone XProtect
- In XProtect Management Client, open Recording Servers. Right-click the server that will receive the stream and select Add Hardware.
- Choose how to add the camera:
-
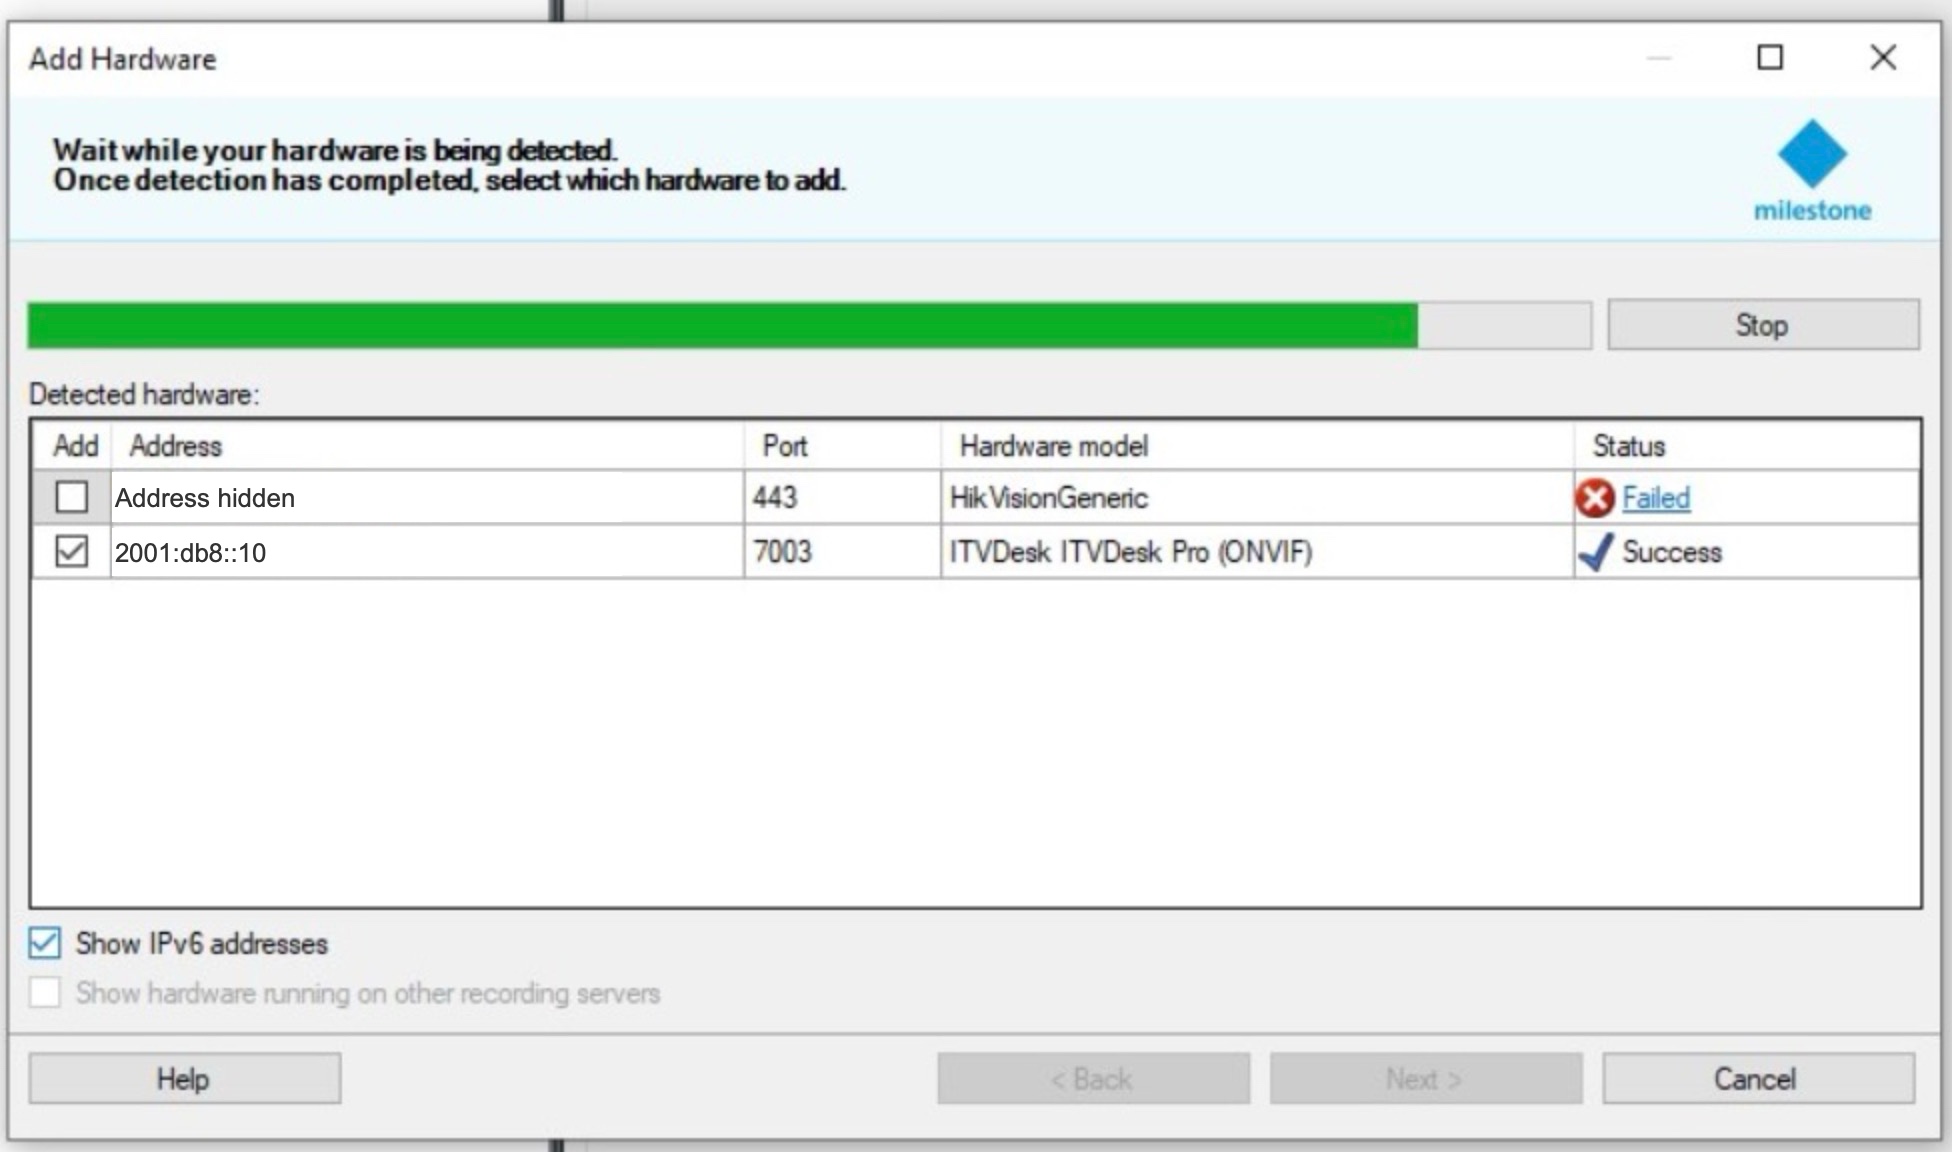
Express: Choose this if the ITVDesk computer is on the Recording Server's local network and your firewall allows ONVIF discovery. Select HTTPS (Secure) if the wizard offers it, then select the detected ITVDesk camera on its active ONVIF HTTPS port. Enable Show IPv6 addresses to see any discovered IPv6 entries.
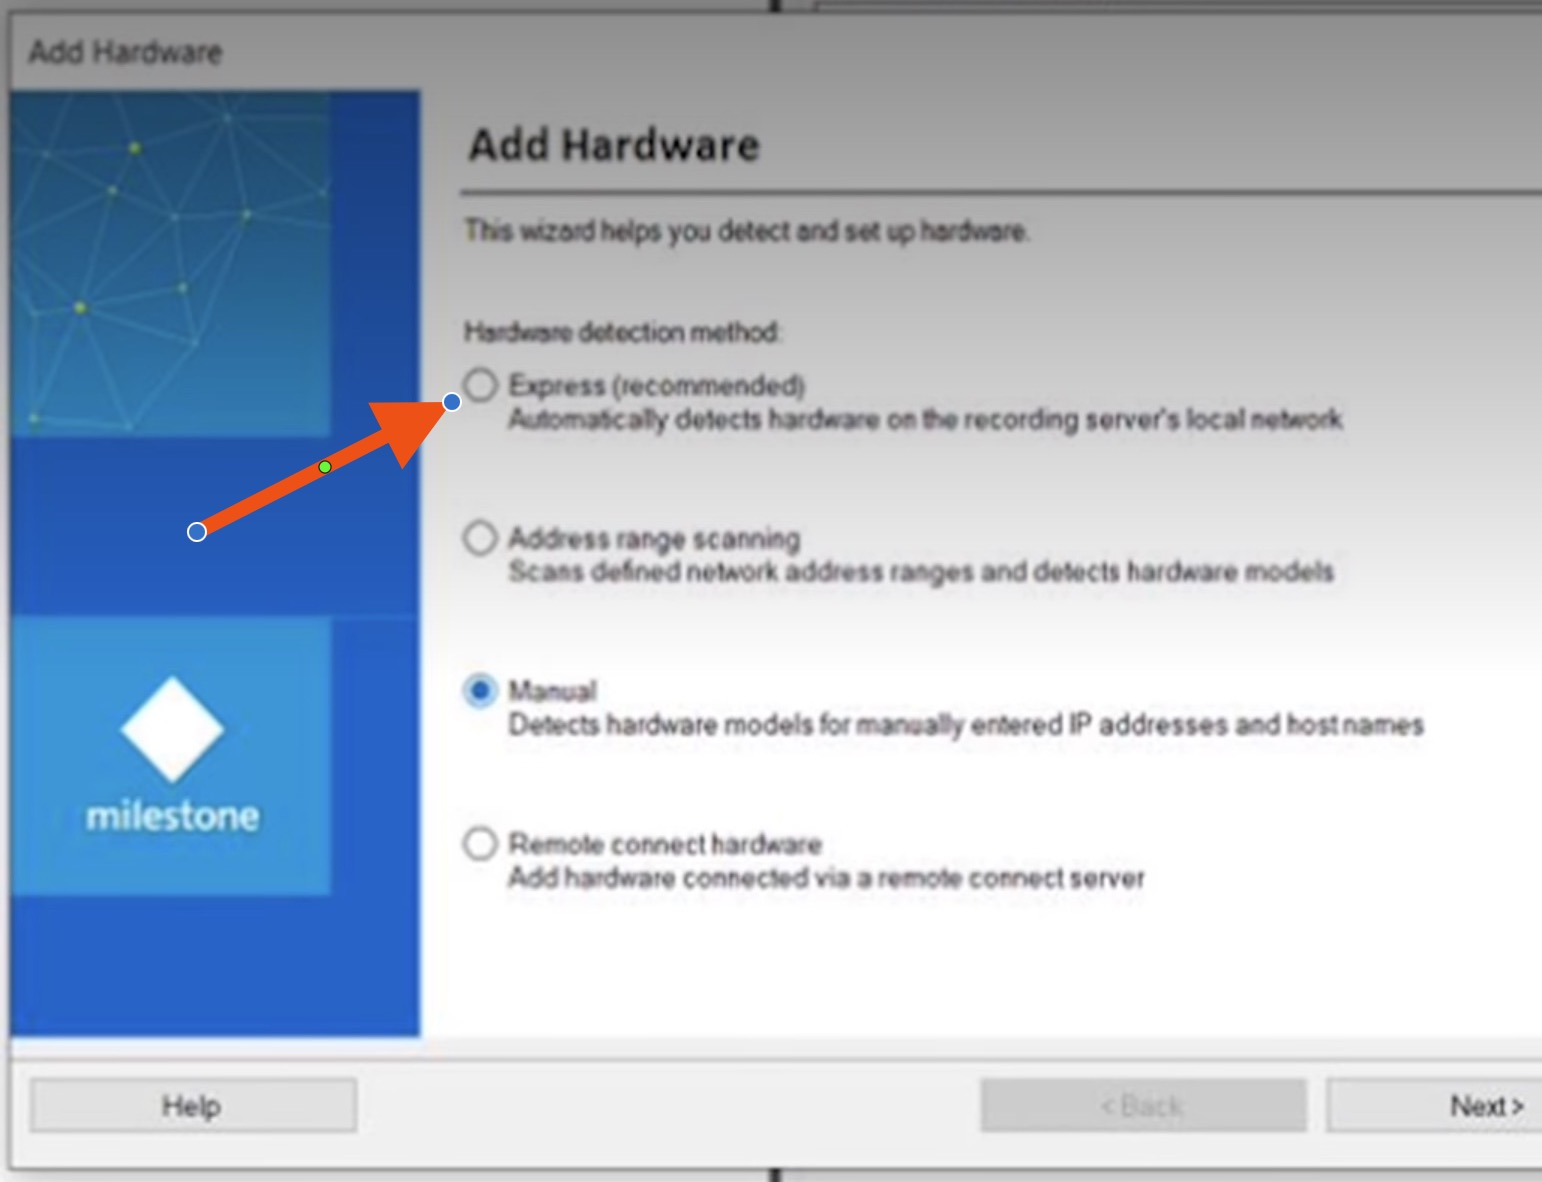
In the XProtect Add Hardware wizard, choose Express to discover the camera on the Recording Server's local network. - Manual: Use this method if discovery is blocked or the camera does not appear in the results. Enter the camera's reachable IPv4 or IPv6 address, its active ONVIF HTTPS port, and the credentials configured in ITVDesk. Select the compatible ONVIF driver for your setup.
-
- Confirm HTTPS on the hardware settings in XProtect where applicable and use a certificate trusted by the Recording Server. Do not substitute the standard RTSP port for the ONVIF HTTPS port.
- Open the added camera's video stream settings and select a secure Streaming Method (also called Streaming Mode). Choose SRTP/RTSPS/UDP or SRTP/RTSPS/UDP Unicast to match the screenshot example. Alternatively, select SRTP/RTSPS/TCP if your XProtect driver supports it for the selected stream and codec. Save the setting.

See Milestone's instructions for adding hardware and setting up HTTPS for hardware.
Choose IPv4, IPv6, or Auto in ITVDesk
In the ITVDesk camera settings, use LAN IP Address to control which addresses the camera uses:
- Auto (dual stack): ITVDesk uses IPv4 and IPv6 for ONVIF discovery and connections when both are available. If only one is available, it uses that one. In XProtect, choose one address that the Recording Server can reach.
- IPv4 only or IPv6 only: Select an address of the desired type and use that same address in XProtect. You can pick a detected address or enter it under Manual; it must be assigned to an active network adapter on the ITVDesk computer.
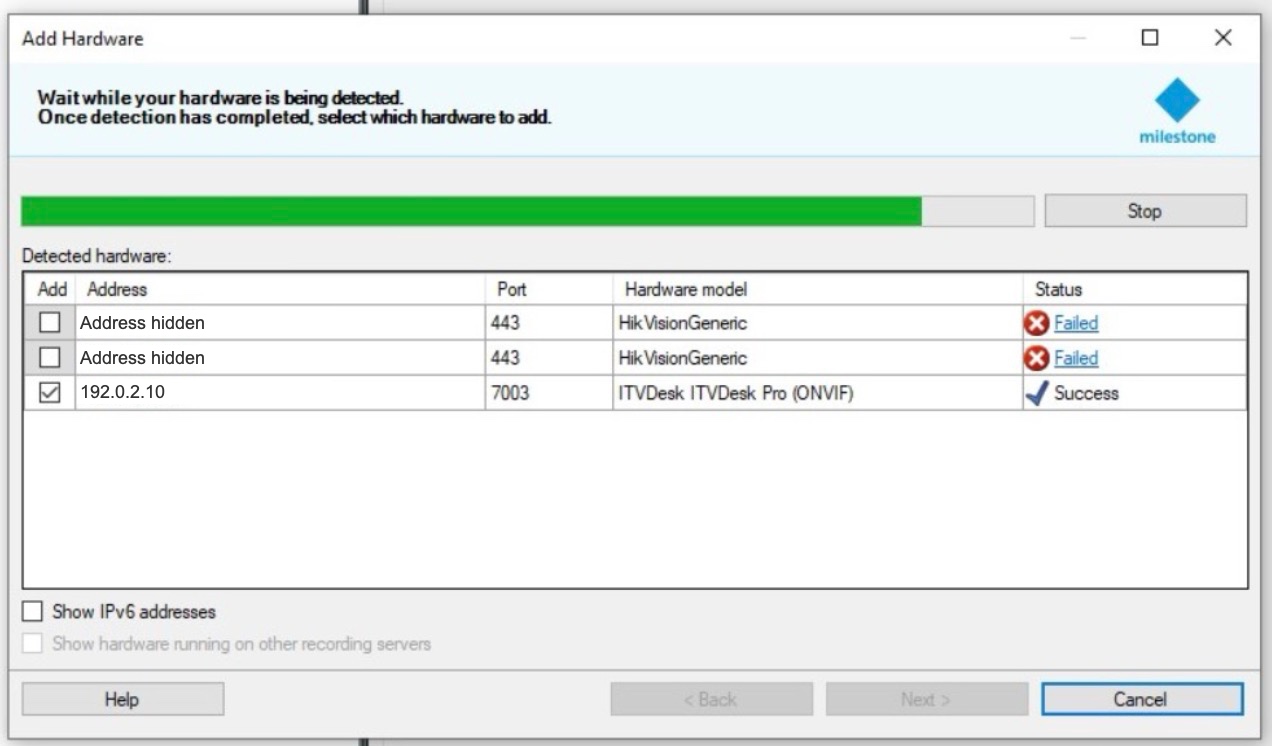
These Express results show ITVDesk detected over IPv4 and IPv6. The screenshots use example addresses; use your camera's actual address and HTTPS port. Select an image to enlarge it.
Use your own TLS certificate in production. ITVDesk includes a default certificate and private key for initial setup or recovery. For production, use a server certificate and matching private key issued for your deployment. Make sure the XProtect Recording Server trusts the certificate issuer and that the certificate matches the hostname or IP address used to connect to ITVDesk. Keep the private key on the ITVDesk host; do not copy it to XProtect.
See ITVDesk's detailed guide to TLS certificates for HTTPS and RTSPS.
3. Enable audio when needed
- In ITVDesk, select an Audio source for the channel instead of leaving it disabled. See Add or select an audio source.
- In XProtect Management Client, expand the hardware under its Recording Server. If the driver exposes a microphone for the camera, right-click it and select Enabled. On the camera's Client tab, set it as the related microphone.
- For recorded audio, enable Record on related devices for the camera and verify the recording configuration. In XProtect Smart Client, test both live audio and playback of a short recording.
See Milestone's guide to recording audio from related devices. Audio availability depends on the source and driver; video alone does not confirm that audio is present or protected.
4. Verify secure transport
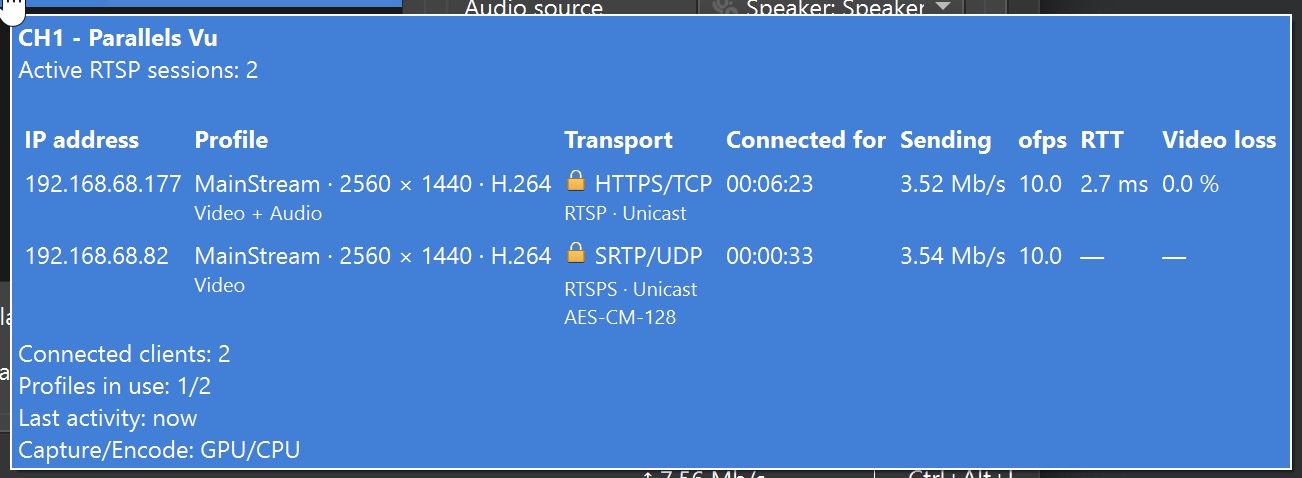
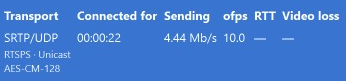
Open live video in XProtect. In ITVDesk, hover over the active channel's connection icon to see its transport. For the UDP unicast example, look for SRTP/UDP and RTSPS · Unicast. If you selected TCP, confirm that the status reports SRTP over TCP and RTSPS. If you enabled audio and the receiver opens it as a separate session, check that session's transport too. The screenshot below shows the video session only.
If the connection does not work
- Required: set the Streaming Method in XProtect. Select SRTP/RTSPS/UDP or SRTP/RTSPS/UDP Unicast for the UDP example, or SRTP/RTSPS/TCP if supported by your driver. If the required secure mode is missing, check your XProtect version, Device Pack and driver. Do not select a plain RTP mode for this encrypted setup.
- Camera not found: If Express does not detect the camera, try Manual with an IP address the Recording Server can reach. Check the active ONVIF HTTPS port, credentials and certificate trust. See ITVDesk service port settings.
- Camera connects but no video: Check that RTSPS is running, the secure stream mode is selected, and your firewall permits the necessary traffic between the two systems.
- Video works but no audio: Check the ITVDesk audio source, the XProtect microphone and the user's live or playback permissions. Check the related-device recording setting if audio is missing only in playback.
For general onboarding, see Integrating ITVDesk with Milestone XProtect VMS.