Frequently Asked Question
Connect ITVDesk 10.8 to exacqVision as an ONVIF IP camera. Choose HTTP for a basic connection or HTTPS with RTSP-over-HTTPS tunneling for an encrypted connection.
Start your ITVDesk camera first and note its IP address, ONVIF ports, username and password. The ports below are examples: use the values configured for your camera.
A. Connect using ONVIF over HTTP
- In ITVDesk, keep the camera's standard ONVIF HTTP service enabled. The example uses port 7000.
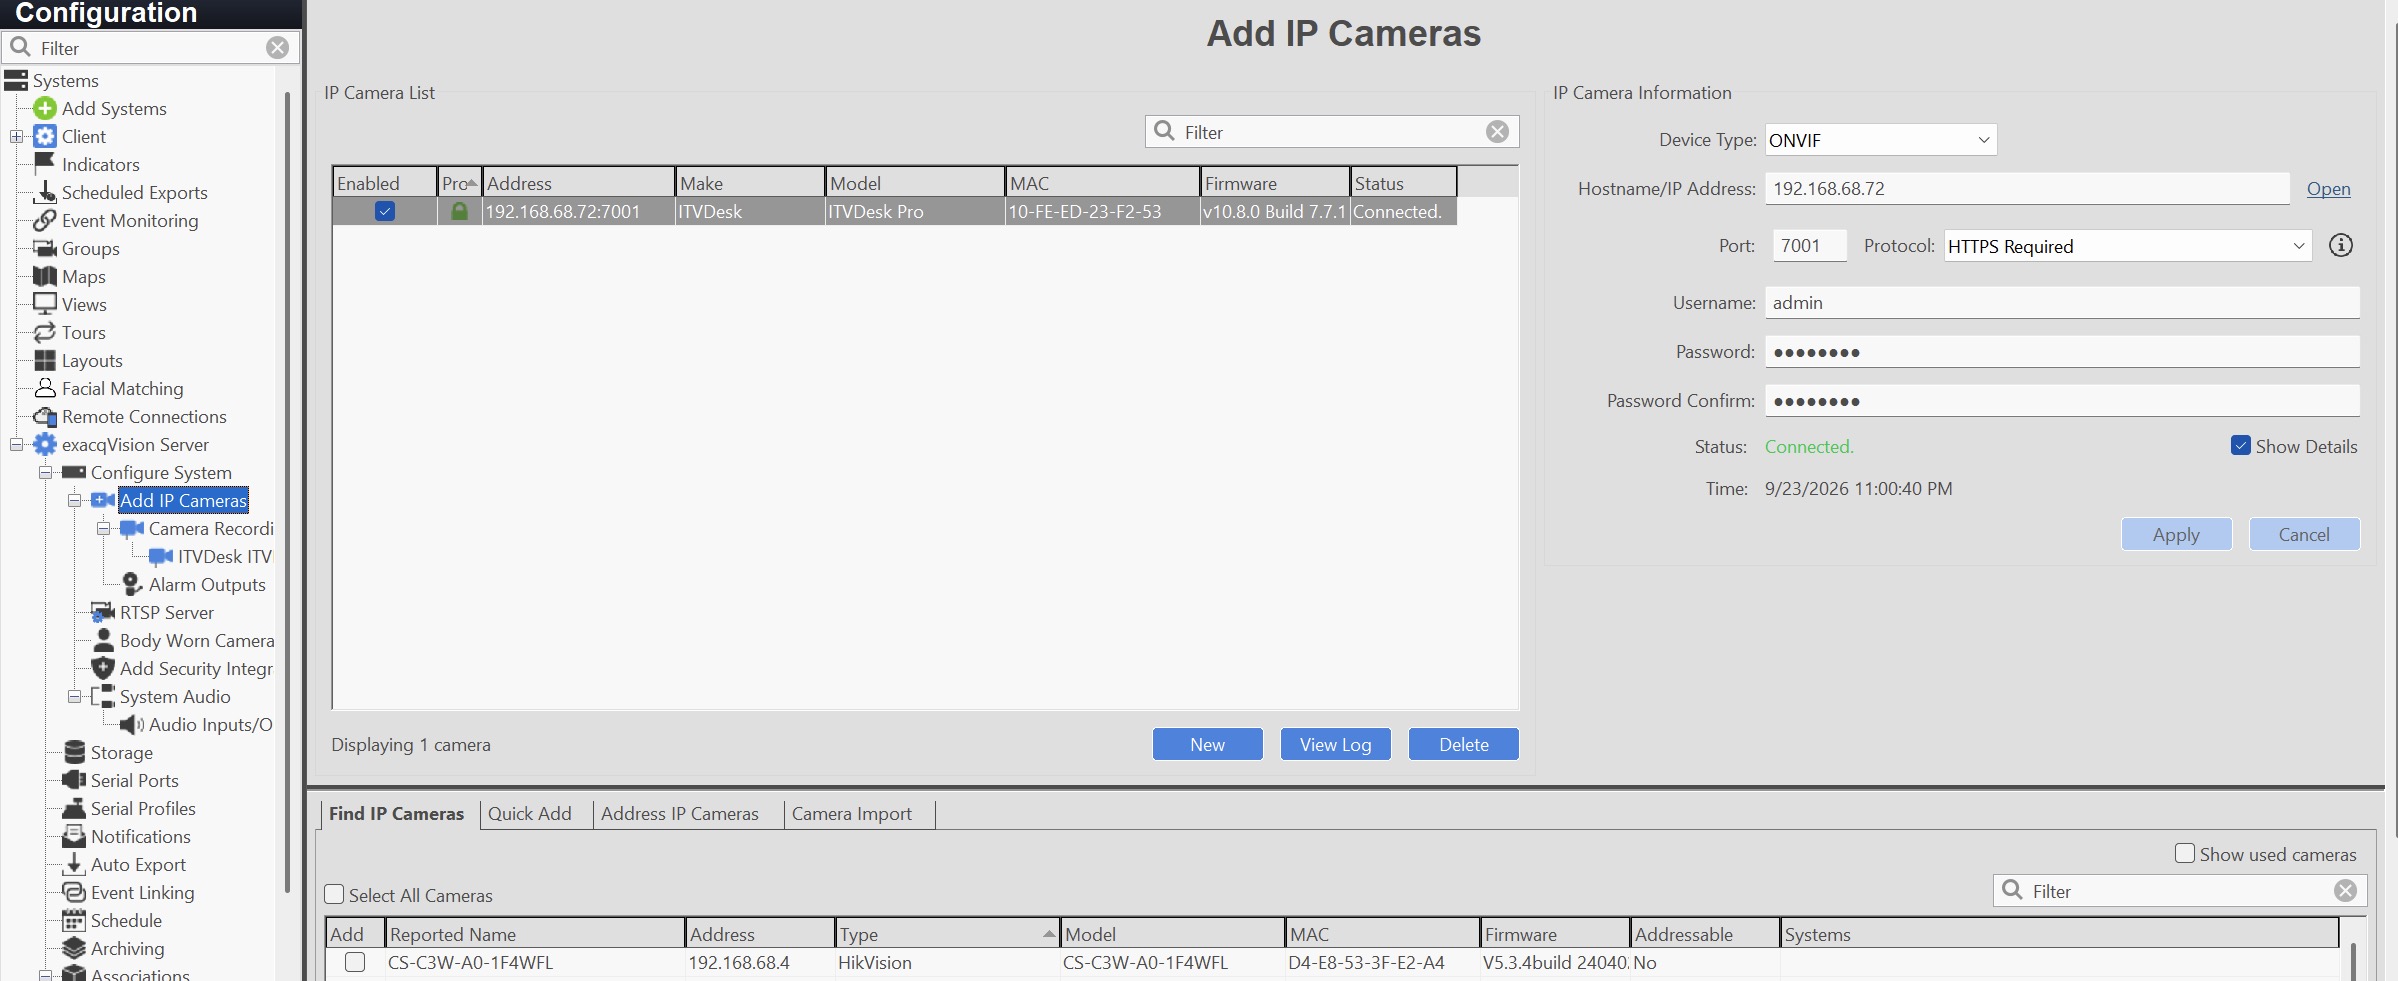
- In exacqVision, open Configuration > exacqVision Server > Configure System > Add IP Cameras.
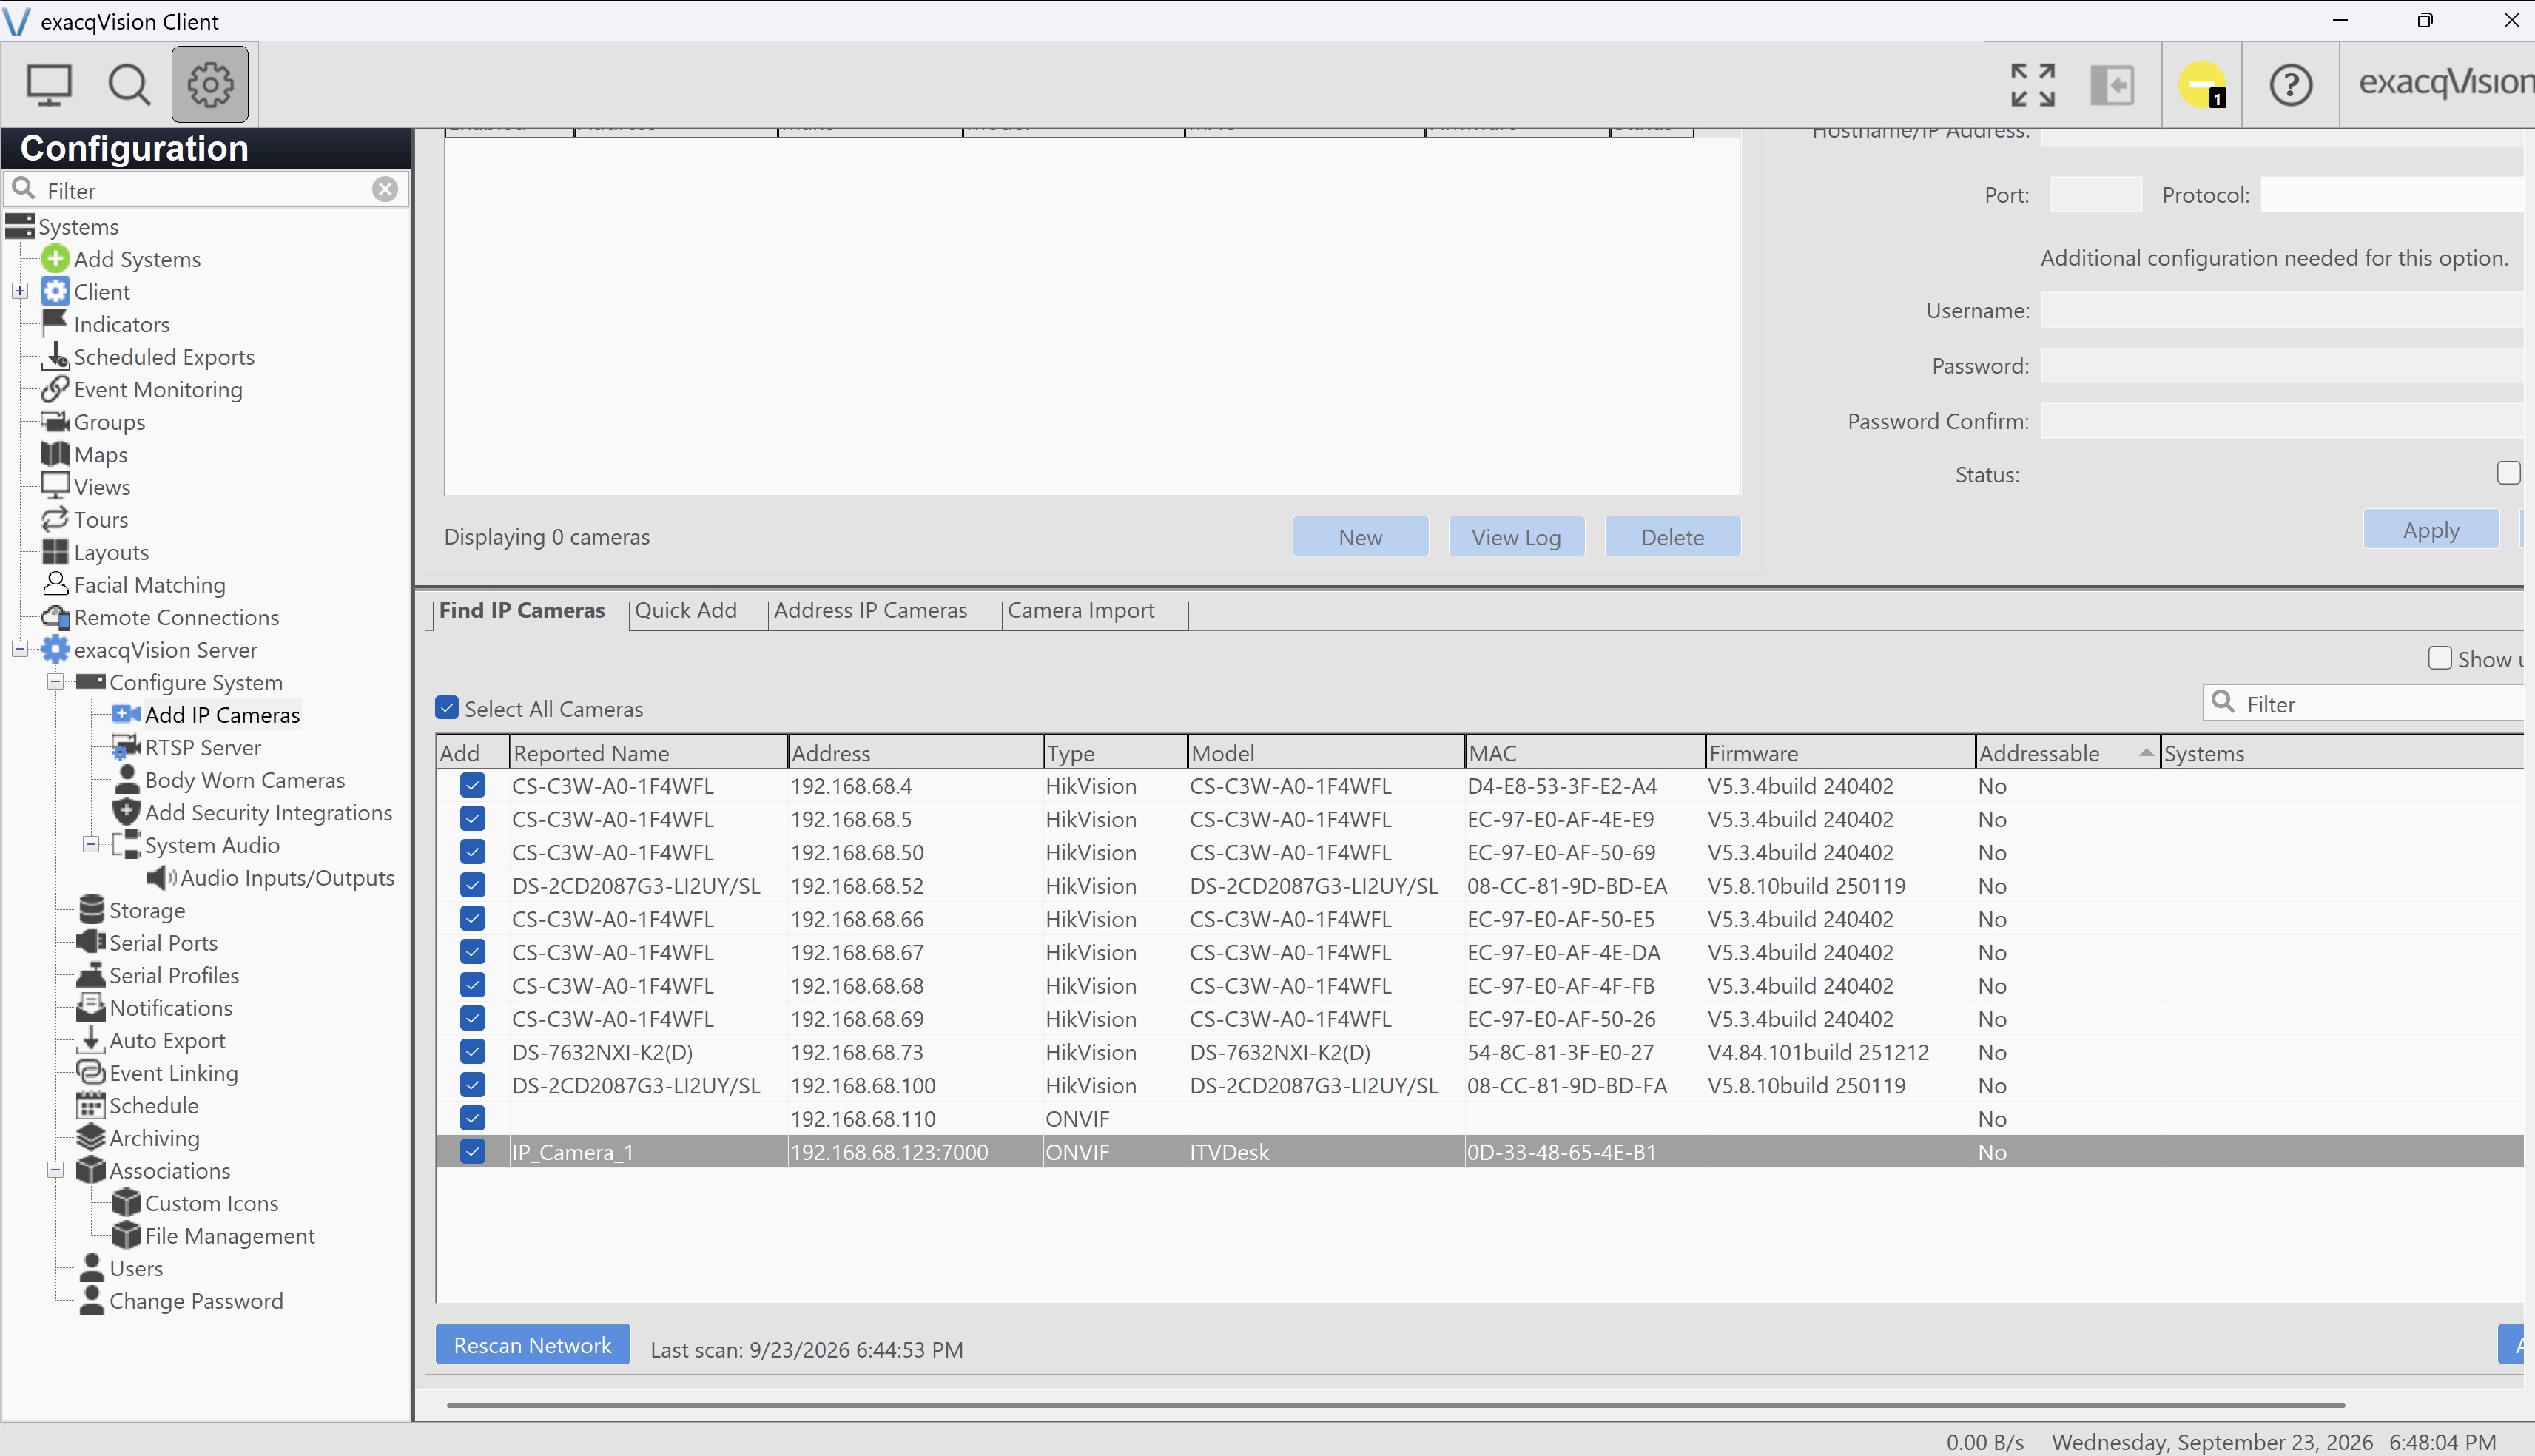
- Use Find IP Cameras > Rescan Network to locate ITVDesk, or click New to enter it manually.
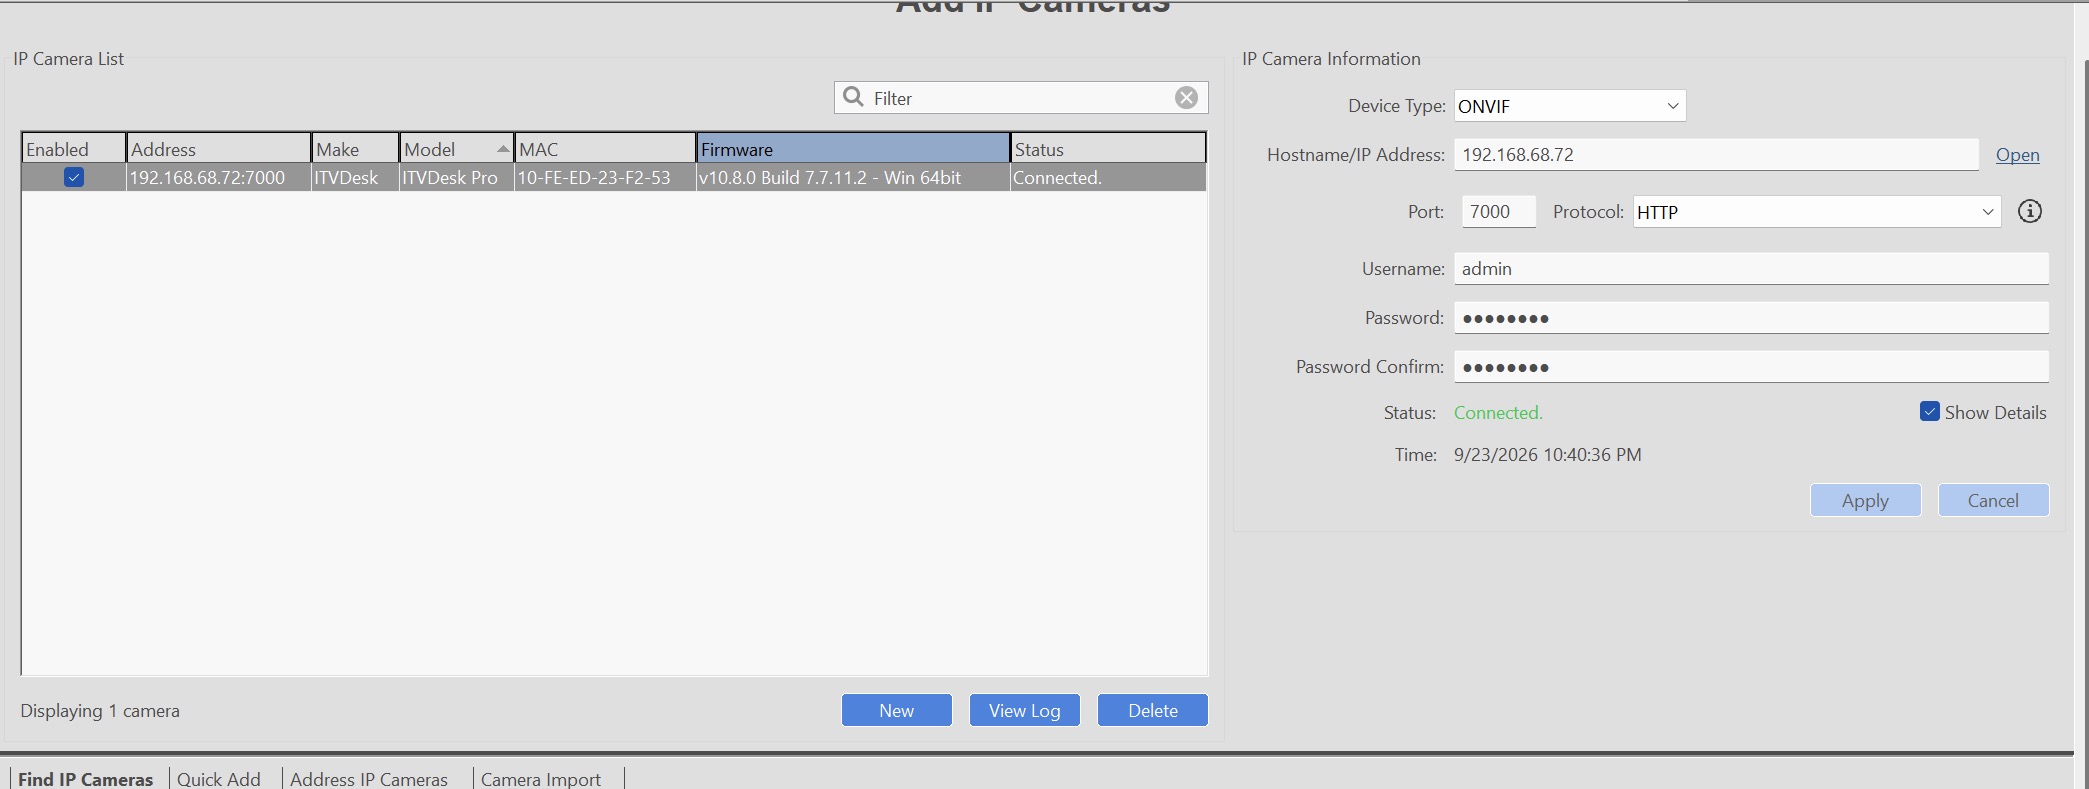
- Select Device Type: ONVIF, enter the ITVDesk computer's IP address, set Port: 7000 and Protocol: HTTP.
- Enter the camera credentials configured in ITVDesk, confirm the password, then click Apply. Check for Connected and open live video.
Note: HTTP does not encrypt the ONVIF connection. Use option B when an encrypted connection is required.
B. Connect using ONVIF over HTTPS
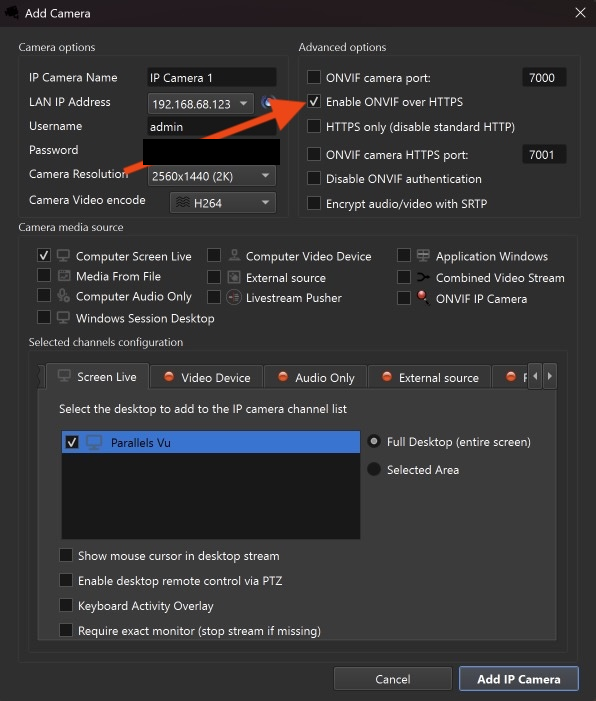
- In ITVDesk, add or edit the camera and select Enable ONVIF over HTTPS. Note its HTTPS port; this example uses 7001.
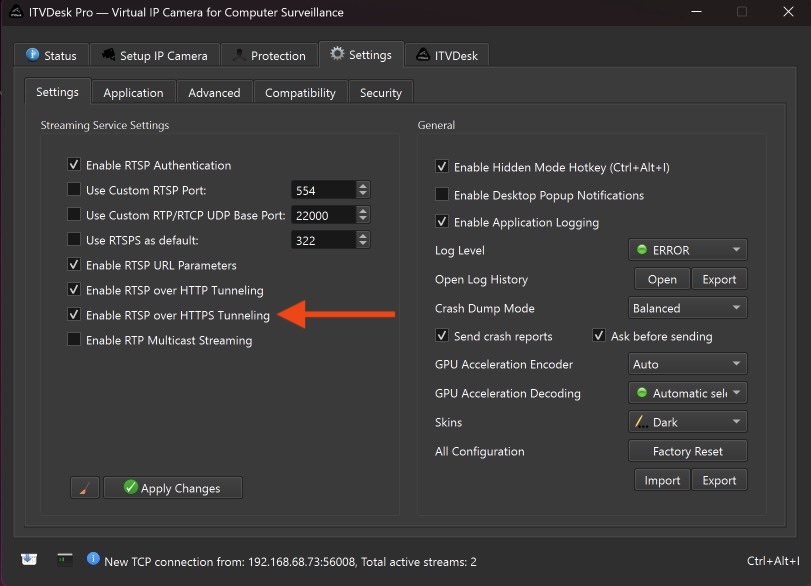
- Open Settings > Settings, enable Enable RTSP over HTTPS Tunneling, and click Apply Changes.
- In exacqVision Add IP Cameras, add or edit the ITVDesk camera. Select Device Type: ONVIF, enter its IP address, set Port: 7001 and Protocol: HTTPS Required.
- Enter the ITVDesk camera credentials and click Apply. Check for Connected, the padlock indicator, and working live video.
Important: Enable both ONVIF over HTTPS and RTSP over HTTPS Tunneling in ITVDesk for this setup. ONVIF HTTPS alone does not establish that the video stream is encrypted. HTTPS tunneling uses the camera's ONVIF HTTPS port, not the standard RTSP port 554.
If the camera does not connect
Check the IP address, credentials, selected HTTP/HTTPS port and firewall rules. For HTTPS, check the TLS certificate and its trust configuration; do not bypass certificate validation. If the camera connects but video does not start, check HTTPS tunneling for option B and stream settings for both options.
Related: Change ONVIF, RTSP, HTTPS, RTSPS, and service ports | Adjust video quality settings
Live video in exacqVision
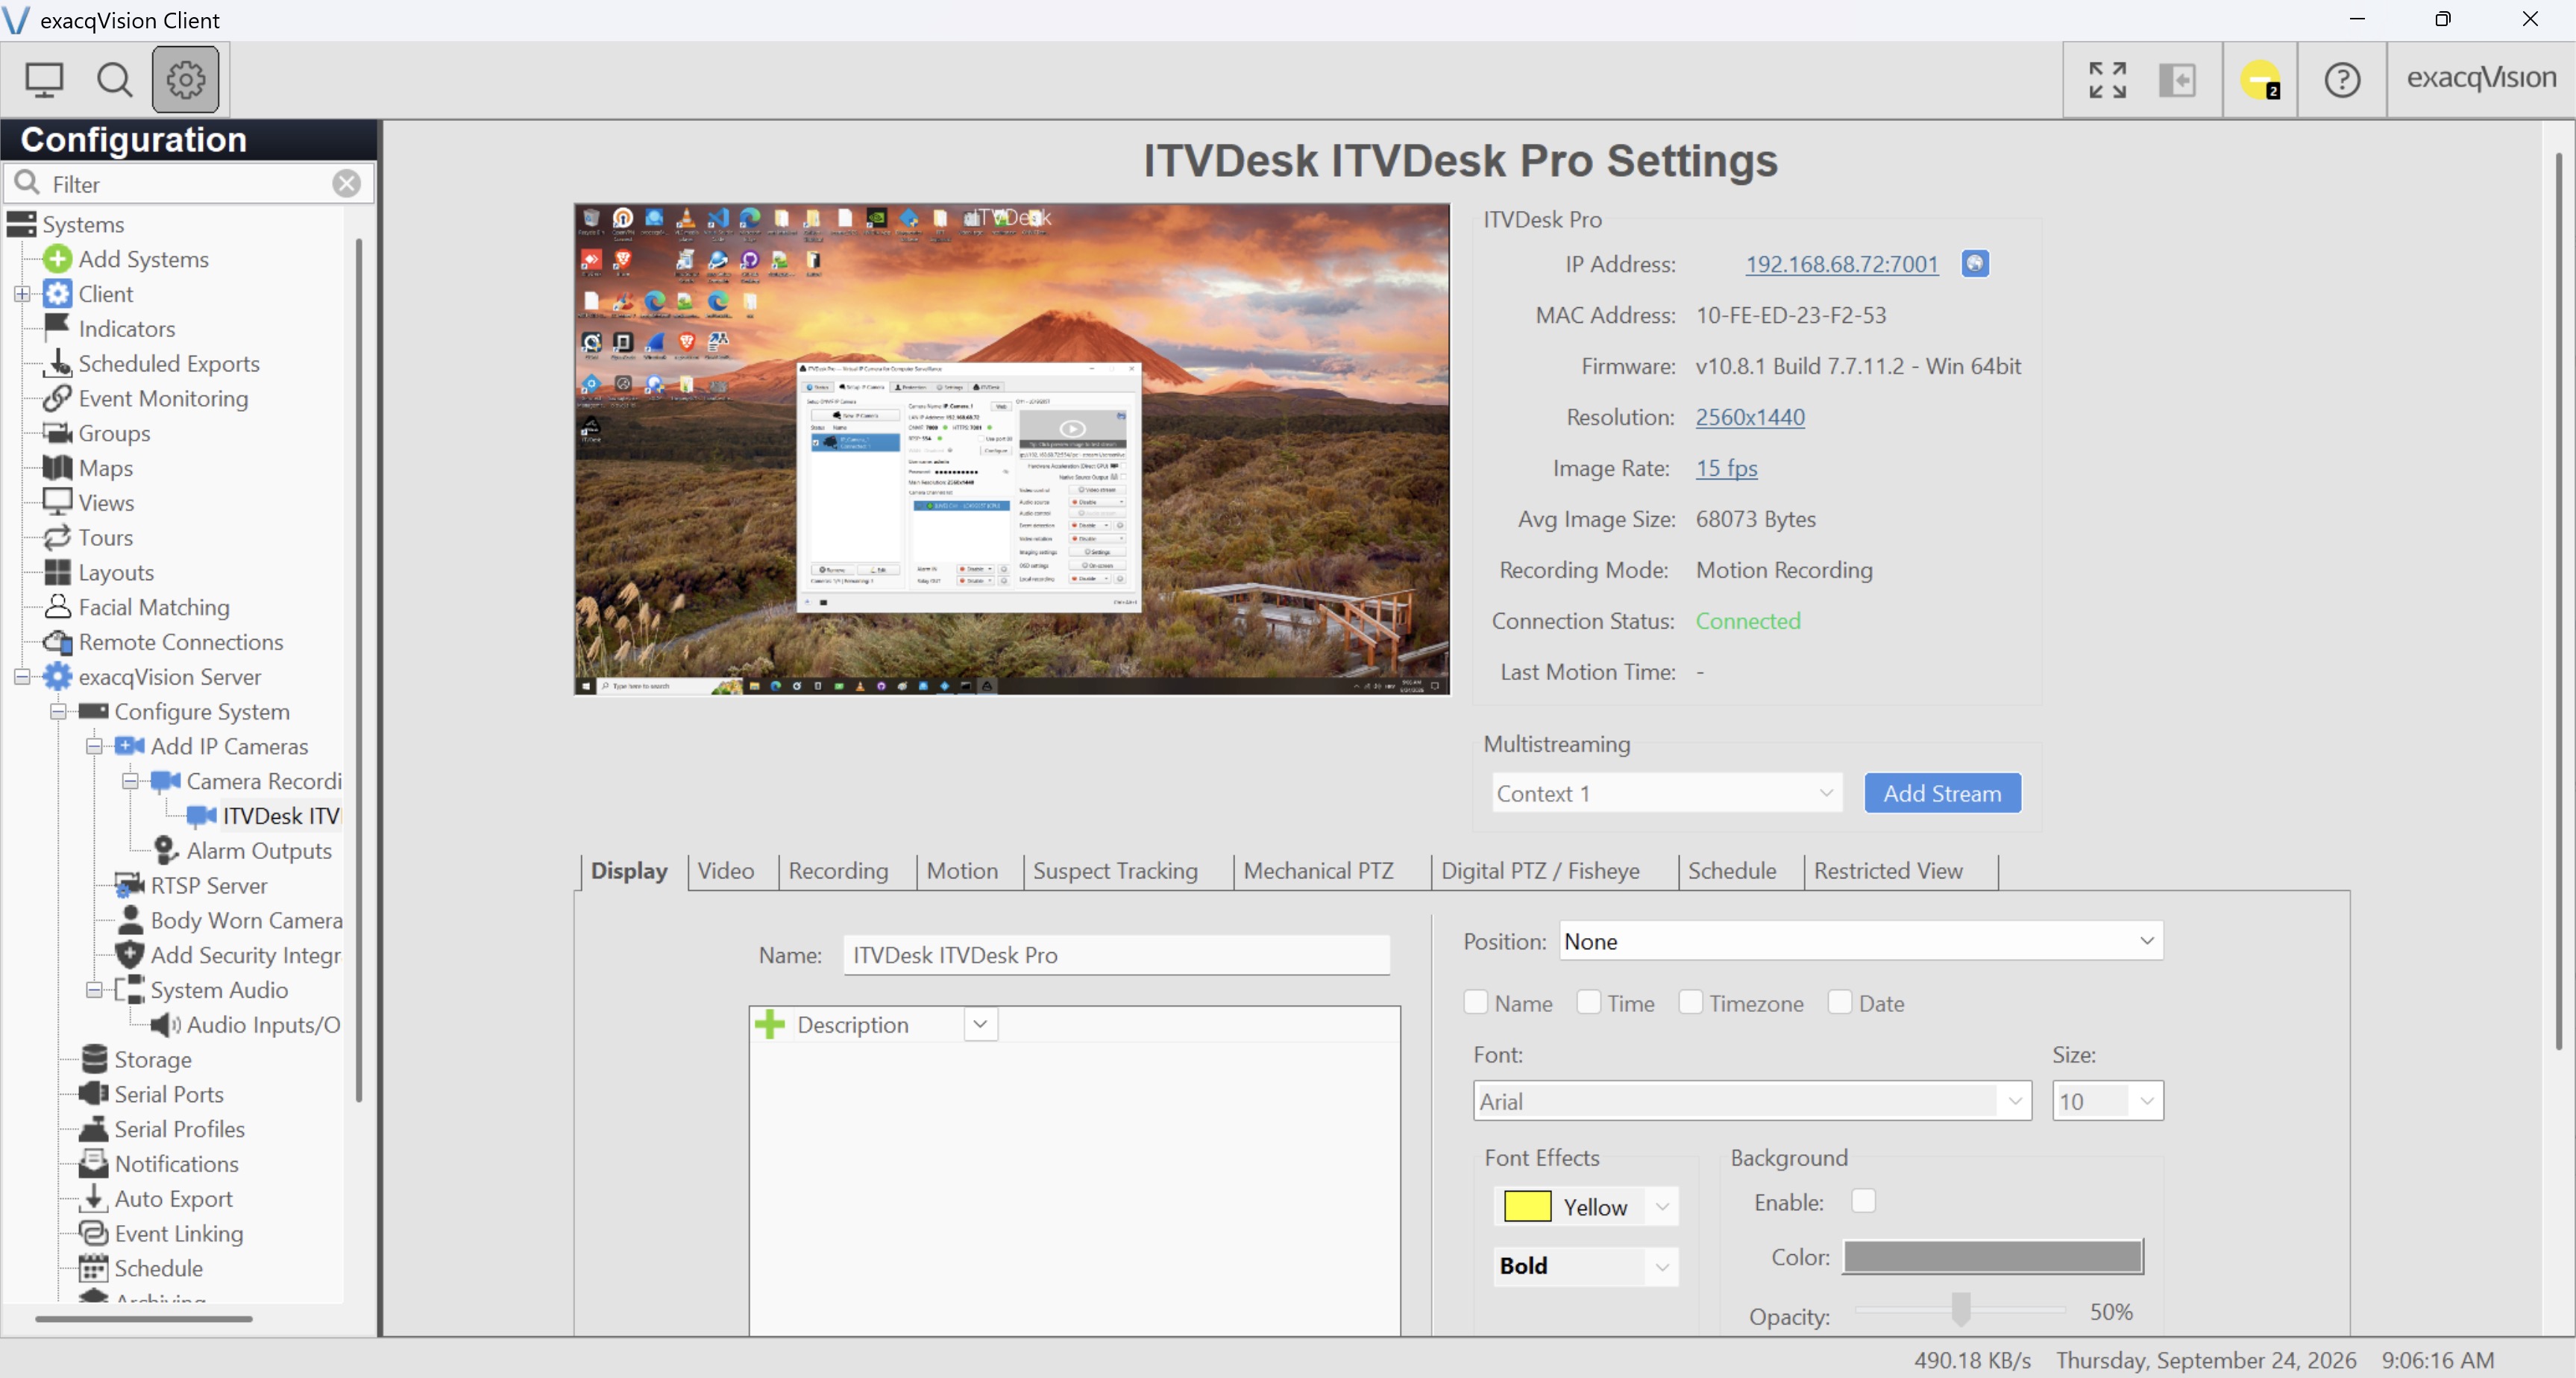
The screenshot below shows ITVDesk desktop video displayed in exacqVision with Connection Status: Connected, at 2560 × 1440 and 15 fps. This example uses ITVDesk 10.8.1.